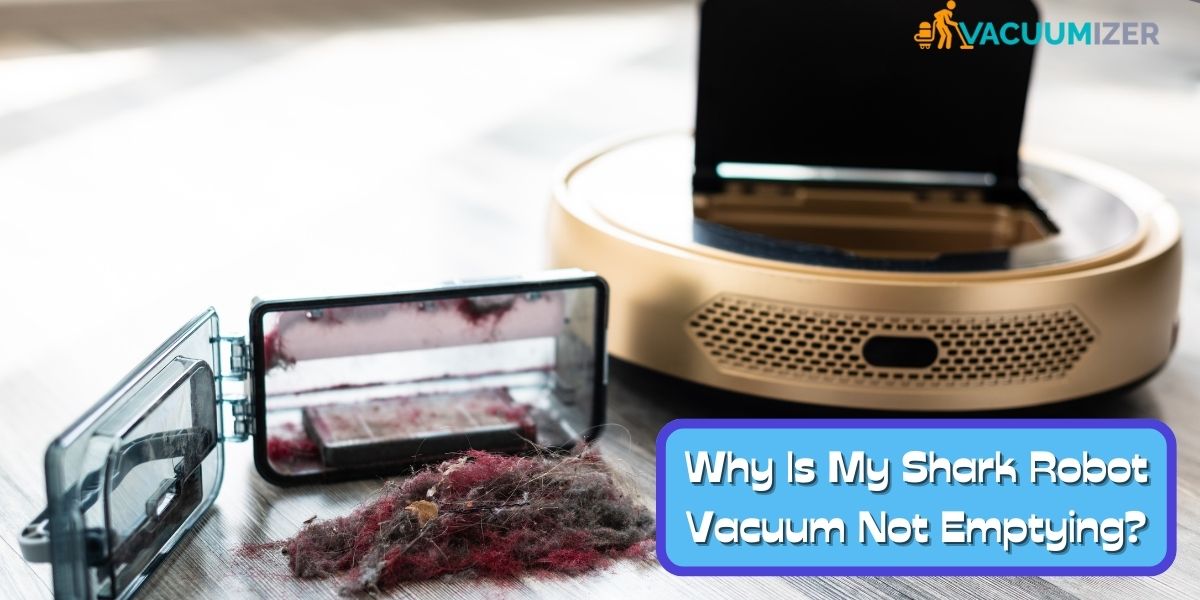
Shark Robot Vacuums have become popular for many homes that want to clean without doing it themselves. These smart gadgets make moving around your house and cleaning the floors easily. But, just like any other technology, they can sometimes break down. One common problem with the Shark Robot Vacuum is that it doesn’t empty its dustbin well. Do you know why it happened? and what the solution it? OK, don’t worry, today I will guide you.
This article will explain why your robot vacuum is not emptying. We will also tell you how you will do it. So, let’s start!
First, you will know why your shark robot vacuum is not emptying.
Table of Contents
What Causes Your Shark Robot Vacuum Not to Empty?
If your Shark robot vacuum doesn’t empty correctly, several things could be wrong.
First, it’s essential to ensure the trash can or other place for trash is not too full. Most robot vacuums have a maximum fill line. If you go over this line, the vacuum won’t be able to empty itself. Also, check to see if any dirt or waste is stuck in the system for emptying, such as:
- The Chute or
- The motorized system for emptying.
If these components get clogged up, the vacuum won’t be able to empty itself. It’s also essential to ensure that both the sensors on the vacuum and the dock are clean and working since they are crucial to emptying.
Lastly, think about the chance that the vacuum’s self-emptying feature is broken.
If this is the case, please follow the instructions below before you go to Customer Service at Shark. Because if you follow the instructions or tips to solve the problem, there is a 90% chance of solving the problem.
How to Fix Shark Robot Vacuum Not Emptying – ( Best 7 Tips)
Follow the steps below to fix your Shark robot vacuum, not empty it, and clean the vacuum regularly. This will make your vacuum last longer.
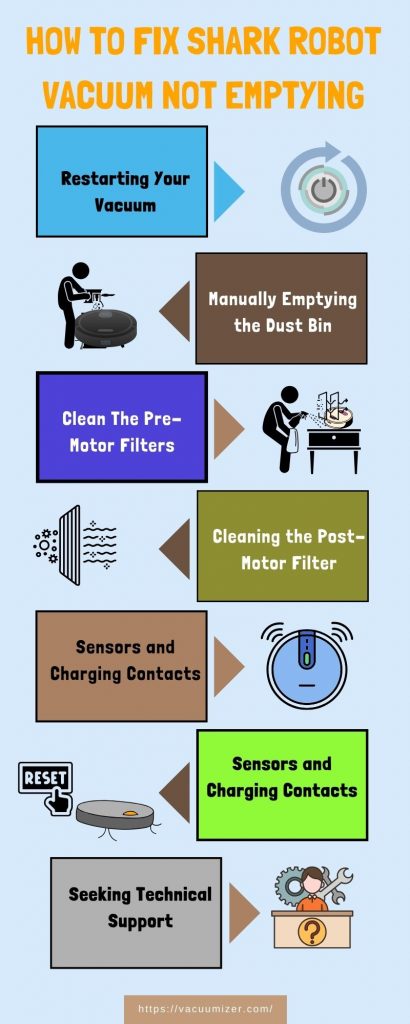
Tip 1: Restarting Your Vacuum
I recommend you to follow this first strategy of ours. Because if there is no big problem, the problem will be solved in this step.
Turn Off: look for the side power button ( ON / OFF)) on your Shark Robot Vacuum and press it. This step makes sure that the vacuum is turned off completely.
Don’t forget to Unplug: Take the charge base away from the power source. This is important to make sure the power goes out completely.
Wait: Allow the vacuum to remain off for at least 2-3 minutes. This waiting time ensures that any leftover charge goes away and the gadget starts over.
Power On: Press the power button again after a short pause to turn the vacuum back on. When you do this, the vacuum’s running system starts up again.
Reconnect: Connect the charge base to the power source again. This lets the hoover start to fill up again.
Note: Small Software problems that can cause your vacuum not to empty the dust bin can often be fixed by restarting it.
Tip 2: Manually Emptying the Dust Bin
If you notice that your vacuum is not emptying itself, check that its dustbin is full. As we mentioned above, this could be one of the causes of your vacuum problems.
Locate the Dust Bin: Do you know where is located, the dust bin? Usually located either at the back or the top of the vacuum.
Remove the Bin: Press the button to carefully take out the trash can.
Empty the Contents: Place the dust bin over a trash can and carefully dump the contents into it.
Clean the Bin: Once the trash can is empty, use a soft brush or a cloth to clean it well. Pay close attention to getting any dirt or waste off the walls or screens inside the bin.
Mind I: Manually emptying the dust bin ensures that there’s no physical blockage causing the issue. And if the dustbin already smells bad, you can go here for a better smell.
Tip 3: Clean The Pre-Motor Filters
If you want your vacuum to look good and clean itself, clean its pre-motor filters at least once a month. Do you know how to clean pre-motor filters? If you don’t know, look below:
Locate the Filters: Check your self-empty base for the location of the pre-motor filters. They are usually behind a cover that can be taken off.
Remove Filters: Carefully take the pre-motor filters out of their case. Be careful so you don’t hurt them.
Clean Filters: To clean the filters, start by tapping them gently to shake off any loose dirt and dust. You can rinse them under running water to clean them better. However, ensuring the filters are completely dry before reinserting them into the vacuum is essential. Mold and mildew can’t grow if things are dried properly.
Mind it: Cleaning the pre-motor filters keeps the vacuum’s power at its best and could fix the problem of it not emptying properly.
Tip 4: Cleaning the Post-Motor Filter
The Post-Motor filter is in charge of restoring the vacuum’s huge sucking power right away. It has a large filter area, is accurate, and doesn’t pollute.
In addition to the pre-motor filters, your Shark Robot Vacuum may have a post-motor filter on the self-empty base. Cleaning this filter is essential for optimal performance. Here’s a detailed guide:
Remove the Filter: Carefully remove the post-motor filter from its housing. Be gentle to avoid damage.
Clean the Filter: To clean the filter, start by tapping it to remove loose dirt and debris. For a thorough cleaning, you can rinse the filter under running water. Like the pre-motor filters, it’s crucial to ensure the post-motor filter is completely dry before reattaching it to prevent any moisture-related issues.
Reattach the Filter: Once dry, place the post-motor filter back into its housing. Ensure it’s securely in place.
MInd it: Cleaning the post-motor filter makes sure that the air the vacuum blows out is clean and helps the dust bin to be emptied properly.
Note: To keep the robot vacuum running well, you also need to clean the Post Motor cleaner. For best results, the company says to clean it once a month and replace it every three to six months.
Tip 5: Cleaning Sensors and Charging Contacts
Sensors and charging contacts play an important role in the navigation and charging of your Shark robot vacuum. Dust and dirt accumulated on these components can be one of the causes of the problem. Here is a detailed process to clean them
Check the Sensors: Look for dirt or debris on the sensors and charge ports. Most of the time, these parts are on the bottom of the vacuum.
Clean Gently: Clean the sensors and charging points with a soft, lint-free cloth or a cotton swab. Make sure you don’t hurt these delicate parts.
Cleaning the sensors and charging contacts ensures that your Shark Robot Vacuum can navigate and dock properly. It is crucial for efficient operation and dust bin emptying.
Note: do you know why your Robot Vacuum Light Blinking? If you want to know please see the link
Tip 6: Resetting Your Shark Vacuum – (2 methods)
You should note that if all the previous solutions do not solve your vacuum problem, then I will tell you to reset your vacuum. There are 2 ways to reset:
- One is through the app, and
- The other is manually.
However, if you reset, you will have to set everything up again. Let’s know how to do it.
Reset it from the app
- Start up the app and sign in. (If needed)
- Look for “Settings” or “Device Management” in the app.
- Find the “Reset” or “Factory Reset” option.
- Confirm the reset. Enter a PIN or password if needed.
- The vacuum will reset and return to factory settings.
- Follow the app’s instructions to reconnect your vacuum to Wi-Fi and set preferences.
Manually reset it
- Find the small reset button on your vacuum.
- Ensure the vacuum is off.
- Press and hold the reset button with a paper clip for 10-15 seconds.
- Let go of the reset button.
- Wait for a few minutes as the vacuum resets to factory settings.
- Reconnect to Wi-Fi and set preferences from scratch.
Tip 7: Seeking Technical Support
If none of the tips in this article has helped you, the last thing I’d suggest is calling Shark Clean’s technical support. They’ll be able to help you solve your problems better.
Note: We have a related post – How to clean poop from a shark robot vacuum. If you want to keep animals in your home, take a look at the link.
Video on why robot vacuum not empty
Lastly, we are going to the conclusion
Conclusion
It can be annoying when a Shark Robot Vacuum won’t empty its dustbin. But the problem is often easy to fix with a few simple steps. You can keep your vacuum running by following these steps:
- Emptying the dust bin by hand,
- Cleaning the filters,
- Sensors, and charging contacts, and
- Fixing any possible jams.
Remember, if all else fails, don’t be afraid to ask for help from technical support.

Hello, I’m Ethan Mitchell. I studied Geography and Environmental Management at the University of Florida. I want to share with you the light of my learning and the beautiful benefits of research. When it comes to cleanliness, the home comes first, so I started my journey out of a personal interest in keeping a house clean.