Robotic vacuums have really changed the game when it comes to modern conveniences. The Shark Robot Vacuum stands out among them because of how well it cleans. But even the most powerful technology needs some care to keep working at its best. Changing the filters is an important part of this upkeep.
Welcome to a guide that will help you figure out how to change the filter on your Shark Robot Vacuum so that it works as well as possible. Dust, germs, and dirt watch out! We’re about to talk about how to keep your floors clean and your home spotless.
First, you will know to change the vacuum filter what tools you will need.
Table of Contents
What You Will Needed
Keep all the tools ready when changing the shark robot vacuum filter, including the workplace below.
- New Filter
- Screwdriver
- Clean Cloth or Brush
- Water (for washable filters)
- Soft cloth or brush
Now, you are ready to change your shark vacuum filter.
Next, you will know the step-by-step cleaning process.
Step-By-Step Guide To Changing the Shark Robot Vacuum Filter
Shark makes robot vacuums that clean your floors easily and conveniently. To maintain their efficiency, it’s essential to change the filter regularly. A clean filter ensures your robot vacuum can effectively capture dust, dirt, and allergens. Follow this step-by-step guide to learn how to change the filter on your Shark robot vacuum:
Step 1: Turn Off and Unplug the Robot Vacuum
Before you begin any maintenance, make sure to turn off and unplug your Shark robot vacuum from the charging station. Safety should always be a priority when working with electrical appliances.
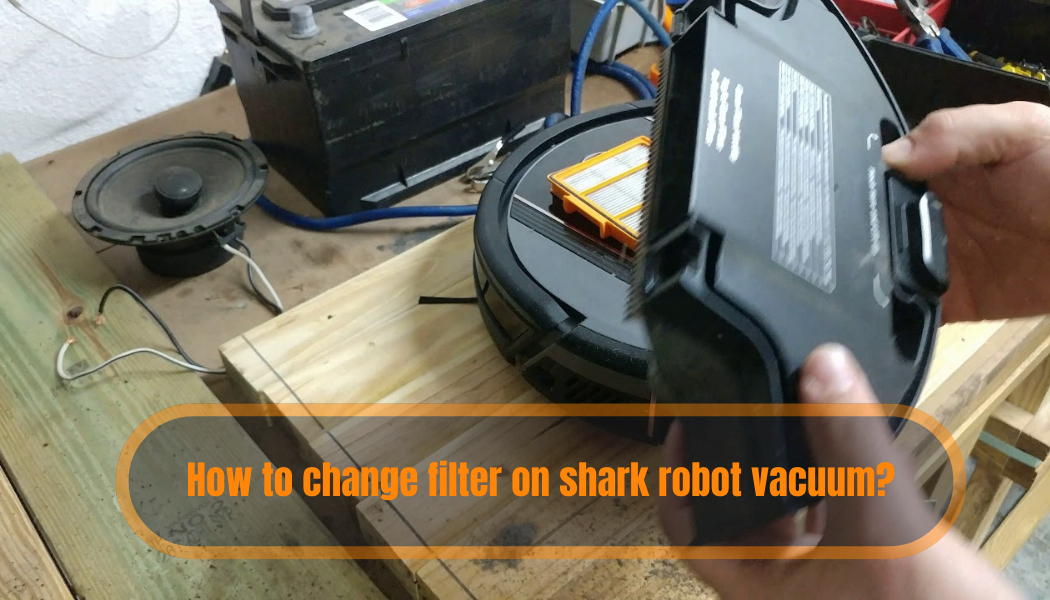
Step 2: Locate the Filter Compartment
The filter compartment is typically located on the underside or side of the robot vacuum. To find the filter compartment on your Shark robot vacuum, consult the user manual. Different models may have slight design differences.
Step 3: Open the Filter Compartment
Using your fingers, press the release latch or button to open the filter compartment door. In some models, you may need to slide or lift a cover to access the filter.
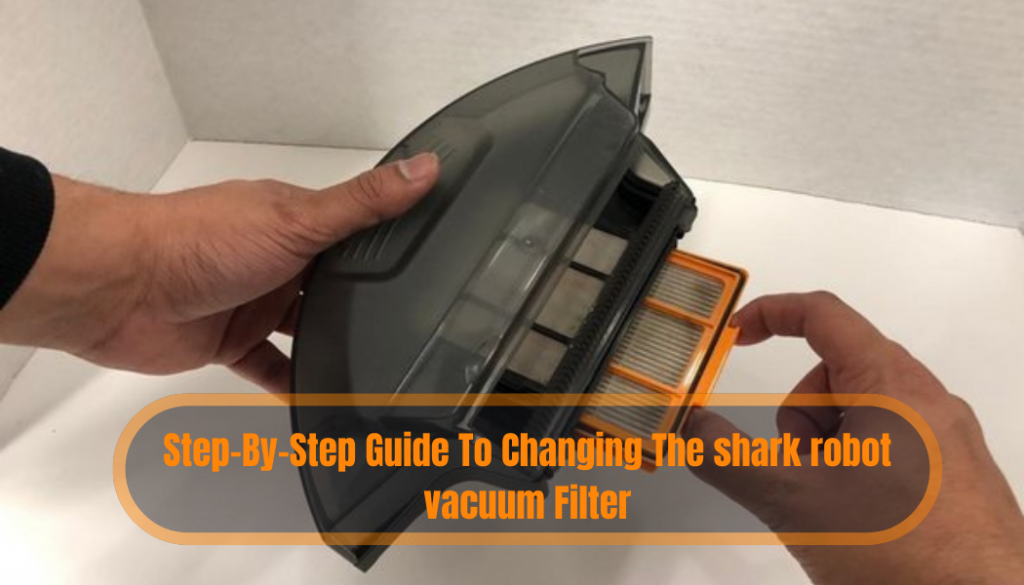
Step 4: Remove the Old Filter
Carefully take out the old filter from the filter compartment. Depending on the model, the filter may be secured with clips or held in place by a frame. Remove the filter carefully to prevent damage to any parts.
Step 5: Dispose of the Old Filter
Dispose of the old filter properly according to your local waste disposal guidelines. If the filter can be washed and used again, read your user manual to learn how to clean and maintain it. If it’s not washable, it should be replaced with a new filter.
Step 6: Insert the New Filter
Insert the new filter, either washable or disposable, into the filter compartment just like the old one. Ensure it fits snugly and securely in place.
Step 7: Close the Filter Compartment
Close the filter compartment door or cover carefully. Listen for a click to make sure it’s closed securely.
Step 8: Cleaning the Filter Compartment (Optional)
If you see dust or debris in the filter compartment, use a soft cloth or brush to clean it gently. Make sure it’s free from any obstructions that might hinder the filter’s performance.
Step 9: Power On and Test
After installing the new filter, put your Shark robot vacuum on its charging station. Then, plug it in and turn it on. Run a test cleaning cycle to ensure that the new filter is working correctly.
Step 10: Set a Filter Replacement Schedule
To keep your performance at its best, follow the manufacturer’s guidelines for changing the filter regularly. Some filters need to be replaced every few months, while washable filters may require cleaning more frequently. Follow the instructions in your user manual for the best filter maintenance routine.
Congratulations! You’ve successfully changed the filter on your Shark robot vacuum.
After that, you will know, how to increase the life extend of your shak vacuum filter.
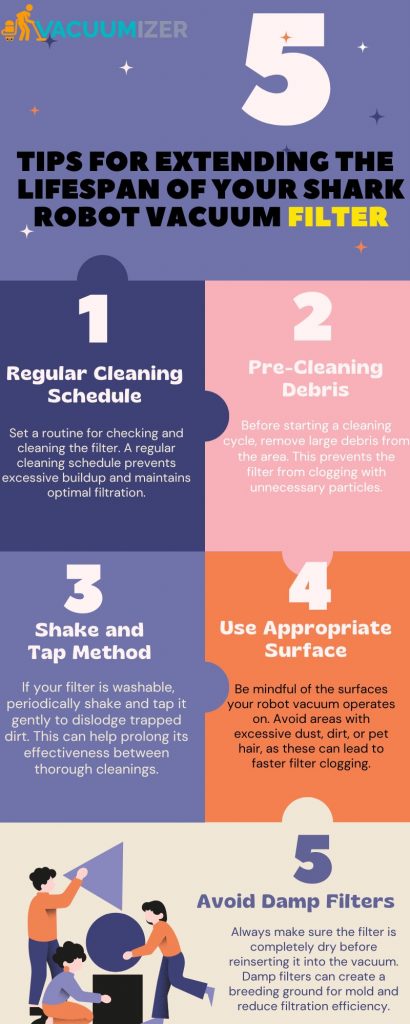
How To increases the Life of Your Vacuum Filter
Here are tips in an infographic on how you can extend the life of your vacuum filter.
Next, you will know some common questions about shark vacuum filter change.
Frequently Asked Questions Of How To Change Filter On Shark Robot Vacuum
How often you should change your shark robot vacuum filter?
How often you change the filter on a Shark robot vacuum depends on a few things. These include the vacuum model, how much you use it, and the type of filter it has. For normal household use, it’s best to clean or replace the filter every 3-6 months.
If you have pets, allergies, or a dusty environment, change the filter every 1-3 months. Check the filter often for dirt. Follow the manual for when to replace it.
What Are The Signs That Indicate The Filter Needs To Be Changed?
After preparing your vacuum, if you notice reduced suction power or an increase in dust and debris being left behind, it’s time to change the filter on your shark robot vacuum.
What Type Of Filter Should I Use For My Shark Robot Vacuum?
To keep your shark robot vacuum working well and keep the warranty, use real shark filters.
Can I Clean And Reuse The Filter On My Shark Robot Vacuum?
No, the filters on shark robot vacuums are not designed to be cleaned and reused. It is recommended to replace the filter when it becomes dirty or every 2 to 3 months.
Conclusion
To make sure your shark robot vacuum works well for a long time, you need to clean the filters regularly. To keep your vacuum working well and make your home cleaner and healthier, change the filters often.
This blog post explains how to remove, clean, and replace the filters in your shark robot vacuum. Don’t forget to regularly check your filters and replace them if necessary. This will not only improve the suction power and performance of your vacuum but also extend its overall lifespan. If you take care of your filters, your shark robot vacuum will work better without any issues.