In the fast-paced world of technology, even the most common parts of our lives have been changed by new technologies. For example, robotic vacuum cleaners have changed how people do things like cleaning. The Shark Robot Vacuum stands out as the best of these automated wonders. Not only does it clean well, it also has a great mapping tool that makes it even better. But you need to know its proper use, however if you don’t know its proper use, then there is nothing to fear.
This guide will show you how to map your space. So your Shark Robot Vacuum can clean efficiently. Get ready to say goodbye to dust and debris. We’re about to embark on an exciting journey to map your Shark Robot Vacuum. This will make your home cleaner and more convenient. Let’s get started!
First of all, you should know why smart cleaning( Robot vacuum) matters in this today’s world.
Table of Contents
Why Smart Cleaning Matters In Today’s World – (You need to know)
In today’s world, it’s essential to have smart cleaning tools like the Shark robot vacuum. It’s helpful and makes life easy. These intelligent gadgets save you time because they clean themselves. This gives you more time to do other things you like. You can control them with your phone and even plan when you want them to clean.
Not only are they useful, but they are also good for your health because they pick up dust and allergens. You don’t have to work hard to move it around with a smart vacuum. Instead, you can just sit back and let the robot do the work.
Plus, it uses less power and less energy than standard vacuums. You don’t have to worry about these smart vacuums making a mess because they don’t run into things and know where to go. It’s essential to keep your home clean to look nice and feel good to live in.
Also, if you use smart gadgets now, you’ll be ready for even more excellent tech in the future. So, having a Shark robot vacuum is about more than just cleaning. It makes life better in a lot of ways.
Next, you will know the most important mapping process.
The Easy Process of Mapping Your Shark Robot Vacuum (Important 8 Steps)
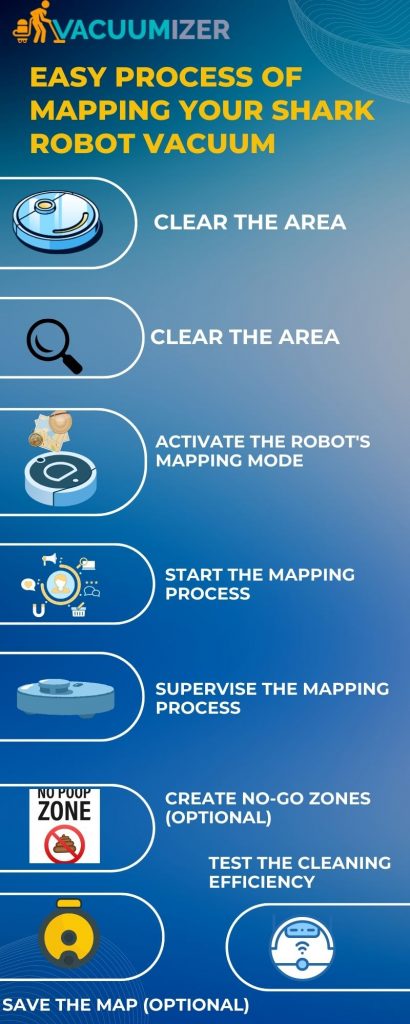
Here is the step-by-step process of mapping your Shark Robot Vacuum for a more convenient and effective cleaning experience.
Step 1: Charge the Robot
Before you start mapping, ensure your Shark Robot Vacuum is fully charged. Place it on the charging dock and allow it to charge until the battery is at maximum capacity. A robot that is fully charged can map without any interruptions.
Step 2: Clear the Area
It’s a good idea to clean the area before your Shark robot vacuum maps your space. Think about it: how much do you like when things in your house are tidy? Then you can move freely in your room. Just like that
The robot can move around better when your area is clear. Also can create a map of where to clean.
If there is stuff on the floor, the robot can get stuck or things can get messy. Also, when the area is clean, the robot can do an excellent job of cleaning as I tested it myself. So, ensure things are clean and tidy before mapping the robot!
Step 3: Activate the Robot’s Mapping Mode
Each Shark Robot Vacuum model may have a different way to turn on the mapping mode. Refer to your user manual to understand how to access this mode on your specific model. Typically, you can press a button or choose a mapping option in the robot’s app.
Here are the names of some apps:
- Shark ION Robot
- HomeConnect
- SmartThings
- Amazon Alexa
- SharkClean
Step 4: Start the Mapping Process
When you turn on the mapping mode, your Shark Robot Vacuum will start exploring and navigating your home independently. It will use sensors and cameras to build a detailed map of the environment. Allow the robot to move freely throughout your home until it has covered all the areas you want to be cleaned.
Step 5: Supervise the Mapping Process
While the Shark Robot Vacuum is mapping, it’s a good idea to supervise its progress. Ensure it doesn’t get stuck, tangled in cords, or encounter any other issues. If you notice any problems, intervene to free the robot and then allow it to continue mapping.
Step 6: Create No-Go Zones (Optional)
Most modern Shark Robot Vacuum models allow you to create no-go zones on the map. There are places where the robot shouldn’t clean, like near pet bowls or fragile furniture. Use the robot’s app or control panel to mark these no-go zones on the map.
Step 7: Save the Map (Optional)
Some Shark Robot Vacuum models give you the option to save the map once the mapping process is complete. By saving the map, the robot will remember your home’s layout for future cleaning, so it can clean efficiently without remapping each time.
Step 8: Test the Cleaning Efficiency
Once the mapping process is done, put your Shark Robot Vacuum to work. Start a cleaning cycle and observe its performance. You can adjust the map or create additional no-go zones if necessary.
Finally, you know how to map connect with your shark robot vacuum.
After that, you will know how the map works in the shark vacuum.
How Mapping Works In Shark Robot Vacuum
Mapping in a shark robot vacuum allows for efficient cleaning. The concept of mapping involves using sensors and advanced technology. These sensors help the robot vacuum navigate through the space accurately. It scans the room and creates a virtual map of the area.
This mapping process enables the vacuum to identify obstacles and plan its path accordingly. The robot vacuum uses its sensors to detect walls, furniture, and other objects in the room. It then determines the best cleaning route to cover every corner effectively.
By mapping the area, the shark robot vacuum can clean the entire room without missing any spots. Mapping is important for the vacuum to clean thoroughly and systematically.
Now, you should know how to customize cleaning preferences and schedules.
How To Customizing Cleaning Preferences And Schedules
With the “SharkClean” app, it’s easy to change how your Shark robot vacuum cleans. First, follow the steps above to get the app and connect it to your robot. Next, look for the “Settings” or “Preferences” area in the app. You can tell the robot to do a quick or full clean. Then, You can change how well the robot picks up dirt. You can tell the robot what kinds of floors you have in your home, and it will clean them better.
It’s also easy to make a cleaning plan. Find “Schedule” in the app and pick a time for the robot to clean independently. Some models even mark “no-go” zones to let the robot know where it shouldn’t go.
Once you set everything, don’t forget to save the changes. If you do this, your Shark robot cleaner will clean the way you want it to. Cleans up your house without any trouble.
Next, you will know how to maintain and care for your shark robot vacuum.
Maintenance And Care For Your Shark Robot Vacuum – (9 Tips)
To keep your shark robot vacuum working well, you need to take care of it. Keeping your vacuum clean and well-maintained helps it work well for a long time. Here are some tips to keep in mind.
- Make sure to empty the trash after each cleaning so it stays useful.
- You should clean (change) the brushes and filters often so that dirt and hair don’t get stuck in them.
- Check to see if anything is stuck in the wheels and clean them so the robot can move smoothly.
- Clean the robot’s sensors and charging ports to help it move around and charge easily.
- Watch the brush roll for twisted things and slowly pull them out.
- Make sure there are no things in the way of the robot so it doesn’t get stuck.
- Put the charging station in a good place where the robot can easily find it.
- The robot vacuum should be kept in a cool, dry place when it’s not being used.
- Use the app to make any changes to the robot’s software.
I 100% guarantee that your shake vacuum will be great if you follow all of the above tips.
Then, you will know some common questions about the shark robot vacuum.
Frequently Asked Questions Of How To Map Shark Robot Vacuum?
Can I Customize The Cleaning Map Of My Shark Robot Vacuum?
Yes, you can customize the cleaning map of your shark robot vacuum. With the companion app, you can make virtual boundaries that the robot won’t cross.
How Does The Shark Robot Vacuum Navigate And Avoid Obstacles?
The shark robot vacuum can move around and avoid things by using smart sensors and technology. The robot detects objects ahead and changes its path to clean them more thoroughly and efficiently by the sensor.
What Should I Do If My Shark Robot Vacuum Gets Stuck?
If your shark robot vacuum gets stuck, don’t worry. It has built-in sensors that detect when it’s stuck and will try to free itself. If it can’t do it, you can move it and press “clean” to start cleaning again.
Can I Schedule Cleaning Sessions For My Shark Robot Vacuum?
Yes, you can schedule cleaning sessions for your shark robot vacuum. With the companion app, you can schedule when the robot starts cleaning. This keeps your floors tidy effortlessly.
Conclusion
To make your shark robot vacuum work better, you need to map it first. Follow the steps in this blog post to make your vacuum clean your home better. It will save you time and effort.
To begin, remove any objects from the floor and make a special area for cleaning. After that, please turn on the mapping feature on your shark robot vacuum and let it explore your home to learn its layout. After finishing the mapping, you can use advanced features for specific cleaning and scheduling.
If you update the map often, your shark robot vacuum will adapt to changes in your space. Take the time to map your shark robot vacuum. You’ll have a convenient and optimized cleaning experience.